Weblessons header image

Drag and Drop Folders - Basic Classes

<<= Back <<= Computer Classes Next =>>

In this lesson, you will learn:

Wee words of Introduction

While moving or copying files is simple enough, copying or moving folders is another thing entirely. A folder contains files and may contain other folders.

NOTE: Be aware that you are performing the operation on the entire contents of the folder: all of its files, other folders and subfolders.

When working with folders always right click and drag to make the menus appear. That way, it ensures that the destination is clearly understood, and that you can choose exactly what it is you want to do. You can always cancel!

You might be wondering how you copy or move folders from one place to another, since all of the folders seem to appear only in the left pane. Here's how

Drag and Drop Folders
  1. Click the drive containing the folder you want to copy or move.
  2. If a folder is inside another folder, click on the plus + sign for that folder in the left pane. If you click on the folder, a list of folders on the drive or within the folder you selected appears in the right pane.
  3. Scroll the left pane until the destination drive or folder is visible.
  4. Use the Click and Drag techniques to copy or move the folder in the right pane to the destination drive or folder in the left pane.
Dragging and Dropping in Windows Explorer

If you do not have Explorer open, do so now.

Open Explorer and experiment with drag and drop techniques in the dual window pane interface. We will use the Personal 1 Folder again, along with the Text1.txt File and the Personal 2, and Personal 3 Folders, but this applies to all folders and files.

To copy or move files by dragging and dropping objects in Explorer, follow the steps here.

Drive A:\ and the 'Personal' Folders are referenced here, but these techniques apply to any drive or folder.

  1. With Explorer open, expand the My Documents folder tree in the left pane that holds your 'Personal' folders.
  2. To copy the Text 1.txt file in the right pane to the Personal 3 folder you have to make both of the folders visible.
  3. In the left pane under find the Personal 1 folder, and then click to select it. You see the contents of the folder (Text1.txt) in the right pane.
  4. Make the Personal 3 Folder on the Desktop visible in the left pane by scrolling to the bottom of the left window.
  5. When you find the Personal 1 folder, do not click on it. If you do, this will change the view in the right pane to show the contents of the Personal 1 folder. Simply return to step 2 if you need to.
  6. Right Click the Text 1.txt file in the right pane, then drag it over to the Personal 3 folder at the bottom of the left pane and release the Mouse.
  7. Choose 'Copy' from the menu to copy the file.

Right click and drag it onto the Personal 1 folder While the right mouse is dragging it, select the Context menu to Copy it

Personal 3 created

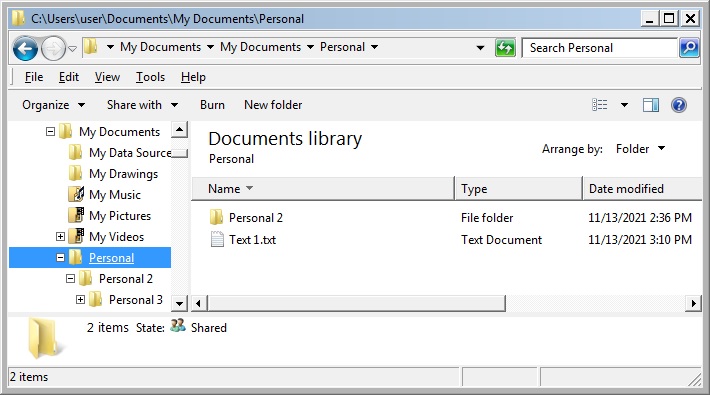
Text 1.txt can be found in your personal folder.

Here's a review:

  1. Click the drive containing the folder you want to copy or move. If a folder is inside another folder, click on the plus + sign for that folder in the left pane.
  2. If you click on the folder, a list of folders on the drive or within the folder you selected appears in the right pane.
  3. Scroll the left pane until the destination drive or folder is visible.
  4. Use the Click and Drag techniques to copy or move the folder in the right pane to the destination drive or folder in the left pane.
  STOP!!

If for any reason you do not understand 'creating', 'moving' or 'copying' files or folders ASK YOUR INSTRUCTOR before continuing!!

NOTE: These are posted for student and staff educational & class use.