
Weblessons.us
| <<= Back | <<= Computer Classes | Next =>> |
In this lesson you will learn:Read to the bottom: Select 'Worksheet 4' and turn it in to your lab instructor. This section describes techniques for working with files. We'll look at ways to create files and we'll look at settings you can make to protect your files and ensure that they get backed up the next time you do a system backup. Opening FilesTo open the file you need,simply double click it. The problem is in knowing where it is and finding where it went when it was saved. This is especially true if someone else made the file or moved it. How to open a file:
There will be more lessons about 'Computer' (or 'My Computer') later in the course Opening Files that Have No Menu or ShortcutWhen there are no shortcuts to be found, how do you open the file? You have to browse to find it using the methods outlined in a later lesson on 'Computer' (or 'My Computer') and Windows Explorer. When you navigate to the folder it is in, double clicking the file will open it in the program that created it and you can continue working with the file normally, re-saving it as needed. We will practice this in another lesson. Saving a FileWithout a doubt, one of the most frustrating things about computers is suddenly losing work. Saving a file is one of the most important jobs the computer does for you, but is often the least understood. To understand where your work goes or why things 'disappear', we need to look deeper. When the file is open, all of the characters and graphics are actually in the computers TEMPORARY memory storage, called RAM. Saving a file places a copy of the file from RAM onto the hard drive or floppy disk or USB drive. If the power were to suddenly go off, all of the data that hadn't been saved yet would be lost forever. It is possible, depending on the program you are working in, to set up an automatic save that will save your file to a default location periodically, usually every 5 to 10 minutes. That prevents massive amounts of work that has been entered from being lost forever when forgetting to save manually periodically. We will cover how to do that in another lesson. Remember that saving a file copies the information from RAM (memory) onto a storage area in either your hard drive, floppy disk or a USB disk where it can be retrieved for later use. TIP: If you opened the file from the location you want to store it in, you can just use the Save button on the toolbar When a file is opened for editing, selecting File >> Save will save the file back to the physical place that it was opened from. This can be confusing. If you need to open the file from your hard disk, and then want to save it to a floppy or USB drive, you cannot just hit the Save button. You need to use File >> Save As, and use the drop down arrow to select the new location. Also, when using the Save button, if you need to know where the file is being saved to, you need to use File >> Save As, and the box that opens shows you where it is going to go. TIP: If you lose a file go to 'Recent Documents' and find the file. Either hold your mouse over it to reveal the location, or open the file and choose 'Save As' and see where it is! To save to different locations follow the techniques below. The best saving method is File >> Save As. Using the Drop down arrow in Save In, you can point to the location, either a hard disk, or to your Floppy disk or USB Drive. 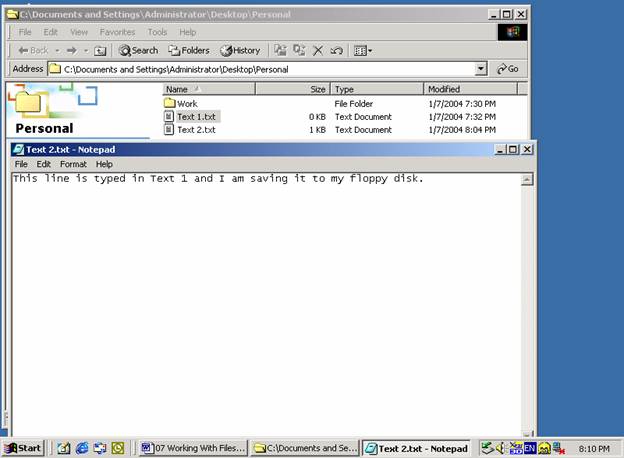
NOTE: However, there is one little 'Gotchya' that you HAVE TO KNOW! The sudden, 'unrecoverable disappearance' of files and lost data occurs because of a major caveat in saving. In fact it is a feature of operating systems that everyone has bumped into at one time or another, so let's dissect it. To demonstrate where things 'disappear' to:
Opening 'Text 1.txt' shows that the document is completely empty, even though you typed text in it! Opening 'Text 2.txt' shows the first line of text that you typed saved to this file. It is not in the first file because saving the file under a new name creates a new file with the new name that contains the information that you are working with at the time. You are no longer working in the original file at all, but the first file is still open and has to be closed before you are finished using the computer. When you look at the title bar at the very top of the document window, you will see which document you are actually working in. When you select 'Save As', this will change to the new name, showing you are no longer in the document you started in. Looking at the document, you can see that the text typed in Text 1 is actually in document 2! What do you see when you open Text3.txt.? STOP! Before continuing, study the concept and make sure you understand why the text is not in 'Text 1' & the text typed in 'Text 2' is not there. If you have questions at this point stop and ask your instructor. |
NOTE: These are posted for student and staff educational & class use.
 or select File >> Save.