
Weblessons.us
| <<= Back | <<= Computer Classes | Next =>> |
In this lesson you will learn:Essential Housekeeping SkillsThis section shows you how to copy and move your files from one place to another safely when working in Windows Explorer. The common term for this is 'house keeping', and is the demanding chore of cleaning up your disks and duplicate files or files that are old, outdated, or no longer needed. The drag and drop technique, cut and paste and menu commands will get a workout, but keeping organized is a key for working fast and efficiently. As you have seen, files, folders and drives are some of the means of organizing data into useful and meaningful hierarchies. As you become more proficient on the computer, file maintenance and house keeping chores of copying, moving, deleting and backing up files will become more second nature. Cut, pasted, dragged or dropped, deleted or wiped. These terms probably sound familiar, but a deeper look shows some very profound differences in the way the operating system handles the file. Copying and Moving FilesCopying and moving a file is inevitable. At some point, you'll need to put a file in another folder or disk. Here are some examples of when you would need to do that.
Print out computer Terminology sheets if you haven't yet Before beginning, you should understand the difference between copying and moving and deleting objects.
There are basically three methods for moving or copying files:
Copying: Prompts the user with a message box "Are you sure you want to copy......". If 'Yes' it makes a duplicate and keeps the original intact including all of its properties. If another object exists in the same folder, 'Copy of' is appended to the name automatically to prevent duplicate names. Otherwise it MUST be renamed for the operation to continue. Moving: Prompts the user with a message box "Are you sure you want to move......". If 'Yes' it copies the file with all of its properties, then changes the properties of the new file or folder to the settings specified by the folder it is being moved to. It then moves the object to the Recycle Bin or deletes the original with no further warning. NOTE: Placing the file in the new location does not guarantee that the properties and attributes (settings) of the file will stay the same. This can create some unwanted effects, especially if the file is 'protected' and then sent to another disk or directory. More on the file attributes and properties is covered in another Lesson. Remember: Copy creates duplicates of files. If you copy a folder to a new location on the same drive when you meant to move it, you'll end up with duplicates of all the files in the folder on the same drive with 'Copy of' attached to it. Drag and Drop Files and FoldersYou may already be familiar with Drag and Drop, but you may not be familiar with Drag and Drop inside of Windows Explorer. Windows Explorer provides unique side-by-side views in which you can select source file(s) in the right pane and locate the destination in the left. First, we'll Drag and Drop between two folders in your student folder. You can use the Mouse to click on the file and drag it to a new location. Use drag and drop techniques when you can see the source and the destination folder, drive or other object that you want to move to. You might need to minimize some windows or re-position others before you can drag and drop an object. In the earlier lesson you created folders inside of each other inside of your student folder. We'll experiment with techniques for copying and moving a file in this folder. The same principal applies to files and other objects. Now it's time to open Explorer and experiment with drag and drop techniques in the dual window pane interface. If you do not have Explorer open, do so now.
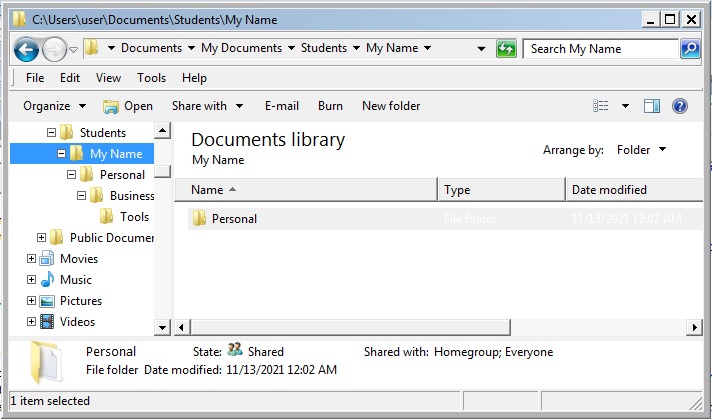 Three folders are created inside of your Students >> [your name] folder You can now use these techniques on your new folders, and this applies to all folders and files. 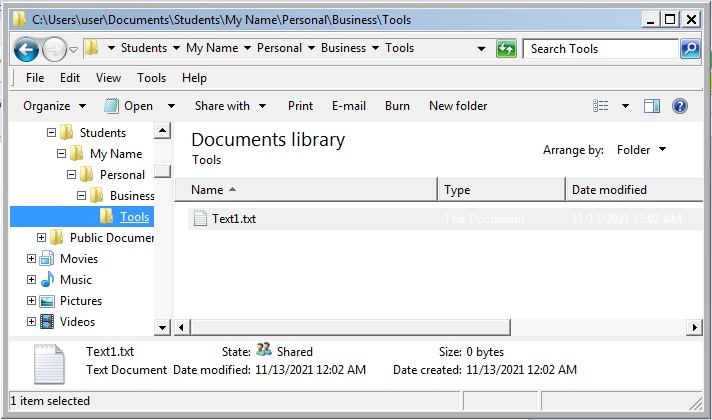
The Tools folder with the Text 1 file inside. To copy or move files by dragging and dropping objects in Windows Explorer, follow the steps here. These techniques apply to any drive or folder.
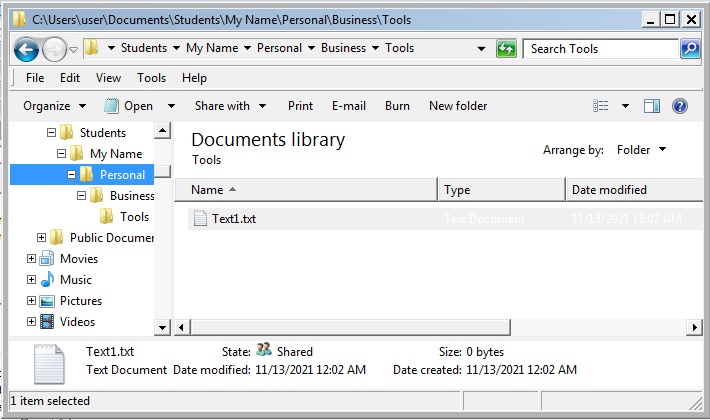
The Personal folder now has a copy of the Tools folder text file In the picture you see that Business folder is selected in the left pane showing the contents in the right pane, which in this case is the Tools folder. Dragging the folder from the right to the left shows a shadow of what is being copied so there is no confusion about what is happening. 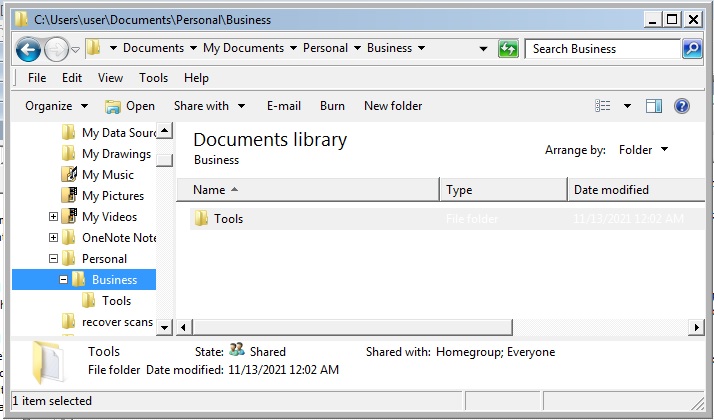
Both the source (right side) and the destination (left side) are visible. These are the steps:
Copying is done the same way, but select 'Copy' from the drop down list. Remember that Right clicking, then dragging the object gives you the context menu with options of what you want to do. As you are dragging, the outline of the object follows your mouse movement and the symbols tell you what is about to happen, so look at the symbol before you release the Mouse Button. To cancel the operation, either press the Escape Key, or select Edit > Undo Move/Copy on the menu, or press my Personal favorite, CTL Z (Press and hold the control key and touch the Z key. If you look in the 'Edit' menu you'll see that Control Z is 'Undo'). Dropping a file onto a Drive opens the Drive and places the file inside. You cannot drag and drop one file on top of another to merge the data or append a file to the bottom of another. If you could, that would be disastrous, because if a mistake was made there would be no way of knowing which file contained the "mistake" and all of them would have to be opened one by one to find the missing data! There are two important points to remember about drag and drop.
Note: the folders on the A:/ Drive and a USB thumb (Flash) Drive are considered the same drive as your Windows Desktop!
If you think about it, this is logical. Windows assumes that if you drag an object to the same drive with the left mouse button you probably don't want two copies of it in basically the same location, so Windows moves the object to the new location and deletes the original. However, if you right click and drag to another drive, Windows gives a context menu with a choice of options, assuming you want to move it. If you really want to copy an object to the same drive, simply right click and drag, then choose the operation you want from the context menu. Another way to copy is to hold the Control Key, then Left Click and drag the object to the destination, but you will see no context menu or warning about what you are doing. Dragging files from the Desktop to a Folder is similar. We can move the file we just put onto the Personal Folder over into the Business Folder. Left click the file in the Personal folder and drag it into the Business folder. Notice what happens when the object is moved directly to the destination, not copied! After releasing the mouse, the file or copy of it is no longer in the Personal Folder on your drive! You are not asked to confirm the operation, and you are not shown a menu of options because you dragged the object with the left Mouse button. Depending where you are in the folder structure, it will either Copy (same drive) or Move it (different drive). The Context menu only appears when you Right Click an object and drag it with the Right Mouse Button. This technique of dragging and dropping files from the Desktop into a folder can be useful. Suppose, for instance, that the folder 'Personal' contained a template file that held often used text information or page layout used in a Personal letter or memo. Whenever you wanted to create a new letter, you could copy the template from the desktop into a folder where you wanted to create the new letter, then rename and edit it. The Desktop is a good place for shortcuts to often-used templates, but it is better to make a folder for them and keep the template shortcuts on the desktop in their own folder. These skills will soon come in very handy! |
NOTE: These are posted for student and staff educational & class use.