
Weblessons.us
| <<= Back | <<= Computer Classes | Next =>> |
In this lesson you will learn:The ClipboardOne of the most brilliant, but completely ignored inventions of all time is the lowly, virtually invisible Clipboard. The clipboard is a place where text, pictures, and even entire files and folders, including large executables, can be parked temporarily and made available for later use. In essence it serves as a very large parking lot that remains hidden and unseen until a magic keystroke brings back your latest capture as if by magic. The amazing thing about it is that 99% of the people that use Office software every single day use it for one thing; copy and pasting the last item that was changed. Little do they know that it actually can be a history of past operations of the work day, and that long lists of operations can be un-done using a special little trick. Cut, Copy and PasteThese techniques involve cutting or copying an object, then pasting it at the new location. This can be a great advantage over the Drag and Drop methods. For the Drag and Drop techniques to work, both the object you want to copy or move and its destination must be visible on the desktop. This is easy in Window Explorer's dual pane window, but... What if you're working inside of a folder window on the desktop and the destination is another folder you either don't have open yet or worse, you can't see it because it is buried beneath other folders or in a list on the Taskbar? Holding and dragging the mouse may get you there unless it is dropped in the wrong place! The Mouse revenge. If the destination cannot be seen or is not readily accessible for a drag and drop, use the Cut, (or Copy) and Paste method. After you cut or copy the object, it is placed on the Clipboard, a hidden 'scratchpad' area, and is then called back for pasting into the document, folder or other file. It will remain on the clipboard until the program is closed, so there is no hurry. Here's how it works:
Once a file is copied or cut, it can be restored even if other items are on the Clipboard and several operations are carried out at once. Here is how do you do that;
As text items are cut or copied they will show up in this clipboard window. At the bottom of the clipboard window is an 'Options' drop down that allows the clipboard to be seen on the Taskbar. As long as Word is open then the clipboard will keep filling up as you work. In the case of text, selecting an item to restore or double clicking on the item in the clipboard will paste it into the blank document and can then be re-pasted into your work area. After the item is on the clipboard, you can leisurely scan through drives or directories until you find the destination, and then paste it. Pasting does not remove it from the Clipboard, so the operation can be rolled back by re-pasting in the original position if necessary. You can also go to the 'Edit' menu and select 'Undo xx' where xx is the last operation that was done. The keyboard command for 'undo' is CTL Z The command for re-do is CTL Y Here's how to copy and move files with Cut, Copy and Paste.
When you are done, undo your changes by selecting Edit > Undo from the menu or press and hold CTL then touch Z to undo the changes. 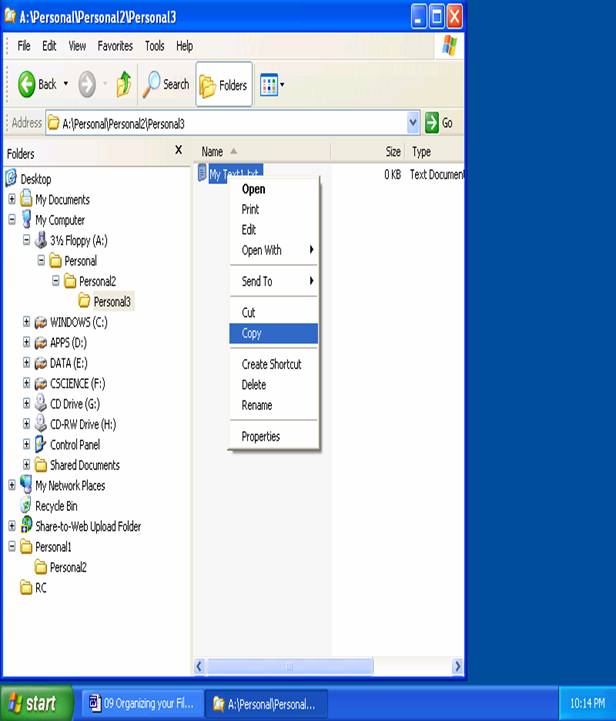
In this example My Text1.txt can be found in the folder. In the picture the address bar shows Personal/Personal2/Personal3 folders. This is the 'Path' taken to find it. This would be the same for any drive, including USB although A:\ drive is used in this example. Your folders will have your files and the address bar shows the path and the source path (shown above) is different than the destination path (shown below). 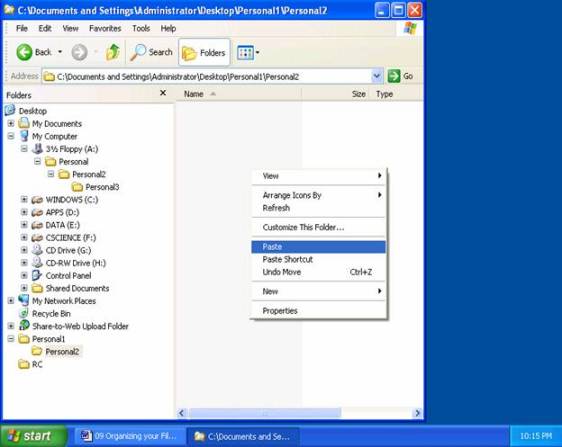
The file is pasted to the destination folder. Some users prefer these techniques over Drag and Drop. When you Drag and Drop, you must first prepare the destination or 'Set the Stage' in advance by making sure you can see the source files AND the destination drive or folder. With Cut and Paste, you work one step at a time. All of these methods work in Windows Explorer and 'Computer' (or 'My Computer'), and you can combine both methods. For example, you might cut or copy files or pieces of files from Windows Explorer, then jump to a folder on the desktop or floppy and paste them in. Cut, Copy and Paste are also available from the Edit Menu. NOTE: Keyboard shortcuts really save time! Any time spent off of the mouse is time saved! If you look at the 'Edit' menu you'll see that Control A is 'select all', Control X is 'Cut', Control C is 'Copy' and Control V (velcro) is 'Paste' etc. The 'open Windows clipboard' trick works pretty slick for text based cuttings, but objects like pictures, files and folders can also be cut / copied. How do we see those? In the Windows XP days of yore (that are no more, along with Win 7 and the Office suites) the clipboard program could be launched separately in the run window as clipbrd.exe. In later versions of Windows that program was taken away and we are now left to third parties to supply a clipboard stand-alone program. However, in Windows 10 version 1809, you can enable the new clipboard by going to Settings, click on System and select the clipboard. The clipboard history is a toggle switch. Turn it on of off as needed. |
NOTE: These are posted for student and staff educational & class use.